Land of Silk and Candy

  • Blog
  • About
  • Hat Gallery
  • Art Gallery

Historical Sew Monthly #1: 1850's straight lasted slippers (or bringing this blog back from the dead)

1/15/2016

0 Comments

 
Well it's really been a while. I didn't stop making stuff but I just didn't get to document them. Many people have encouraged me to start blogging again and I guess I should start again. 

I decided to participate in Historical Sew Monthly this year. The first challenge is  "Procrastination – finish a garment you have been putting off finishing (a UFO or PHD) or make something you have been avoiding starting." 

One thing I've been meaning to start for a very long time is making a a pair of my own shoes. I bought a copy of Every Lady Her Own Shoemaker years ago but I never got around it. The book has several patterns for side-laced boots, which I'm not too big a fan of, I'm far more interested in straight lasted slippers. 
Picture
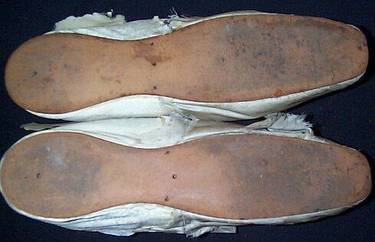
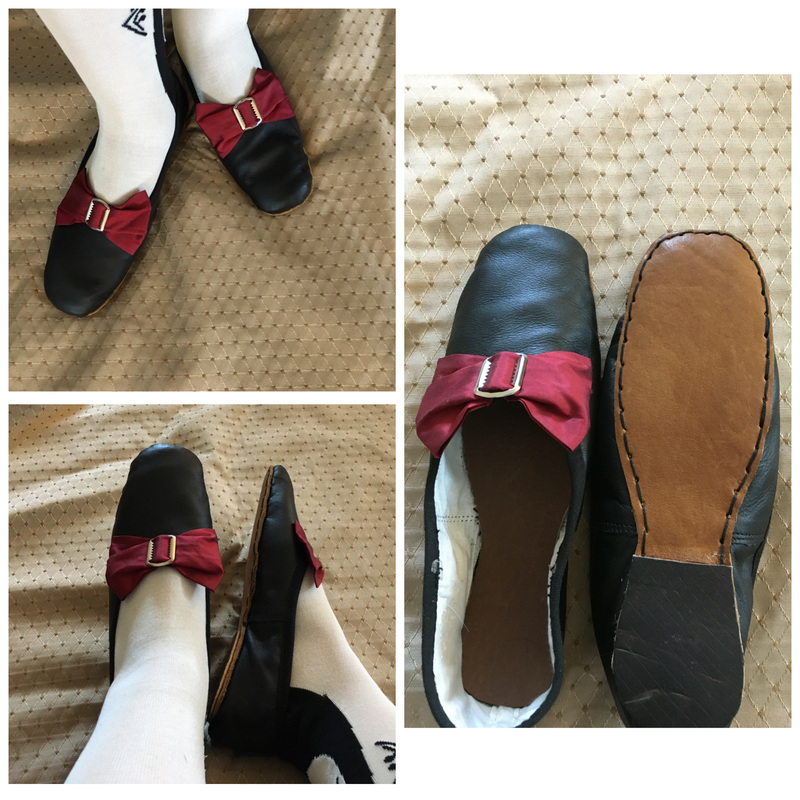
^These are straight lasted shoes. They don't have left and right side. 

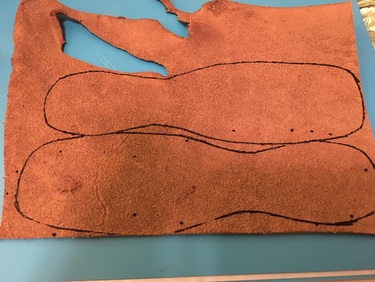
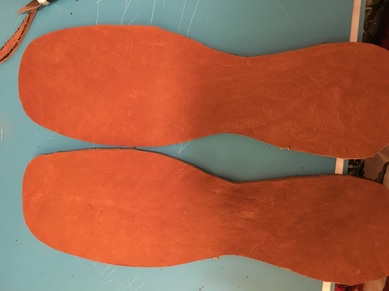
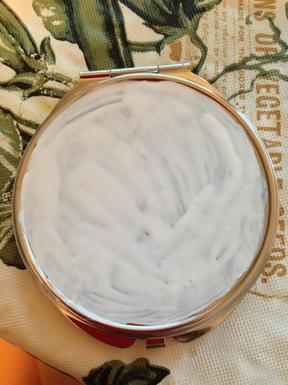
I first cut the sole pattern based on ELHOS. I just used the assorted leather scrap grab bag from Michaels, they are about $5 or less with coupon. Pick the thickest and stiffest pieces for the soles and use a good Exacto knife to cut them out. 
Picture
Picture
For the upper I've considered trying to find kidskin leather. I have no idea where to find it in the quantity I want at a reasonable price. I browsed on eBay for a while and had an Eureka moment: 
Picture
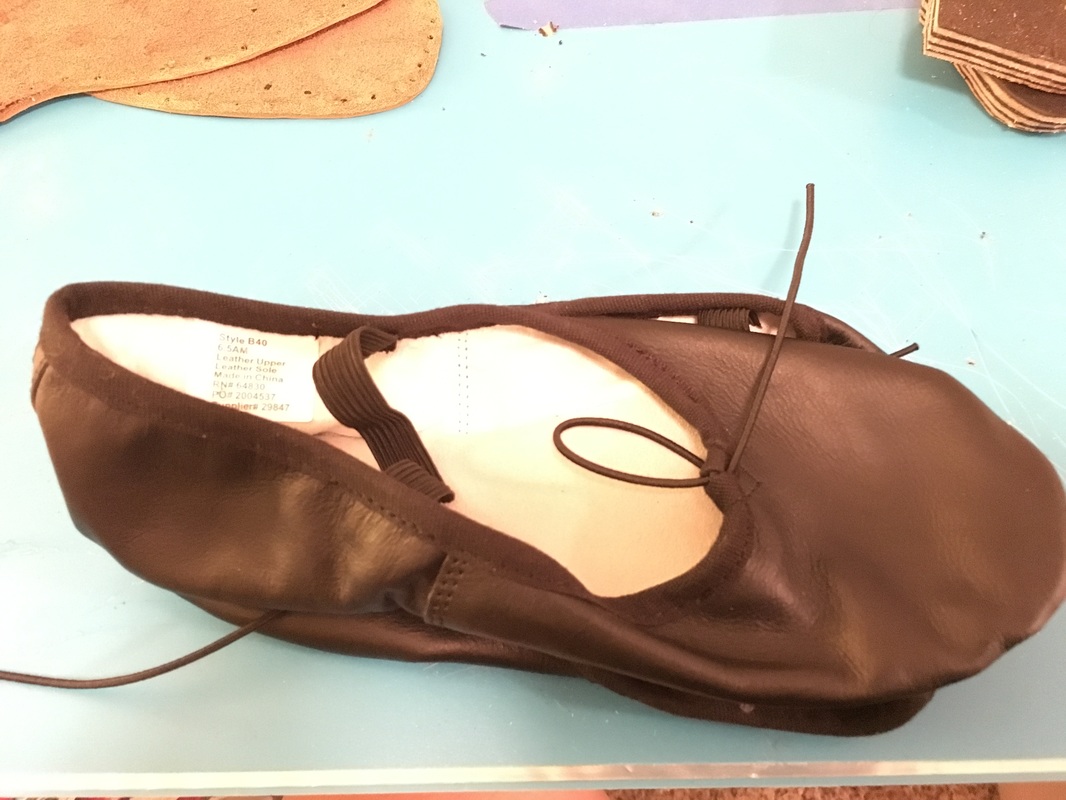
Soft leather ballet slippers! They are usually made from pigskin, but these are soft enough that they could pass for kidskin. The vamp is stitched and binded for me already with historically accurate side seams. Best of all they are less than $9 shipped! (Note that these are ballet shoes you dance in, they are very flimsy and can be taken apart easily. The street shoes commonly called "ballet flats" are too structurally sound to be taken apart. Although you might argue that cheap ones from Payless will fall apart on their own, but I digress.)

(eBay will have a lot of liquidated ballet slippers for sale. If you want to do some more complicated decoration for the vamp you can buy canvas ballet slippers for only $2.98 shipped instead.)
Picture
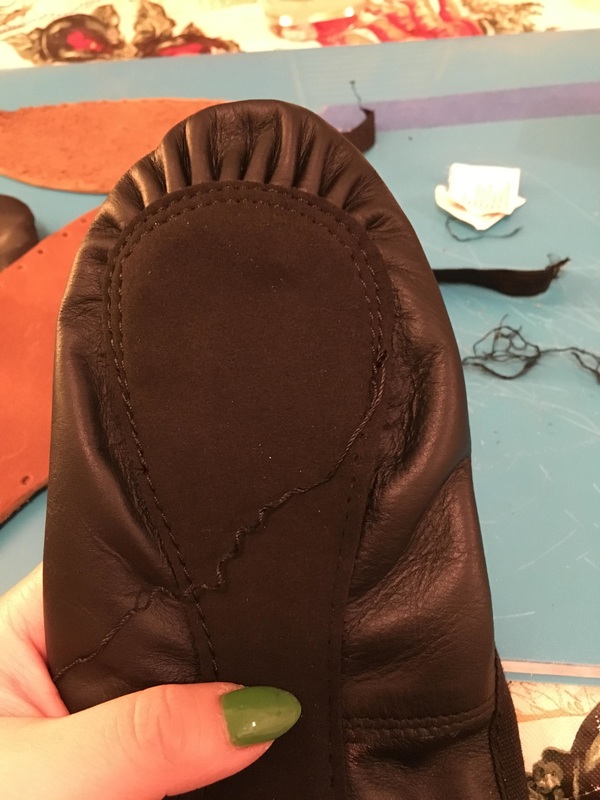
You will want to remove the elastics and insole of the ballet slippers first to expose the stitching to the sole. Unstitch the sole from the top 
Picture
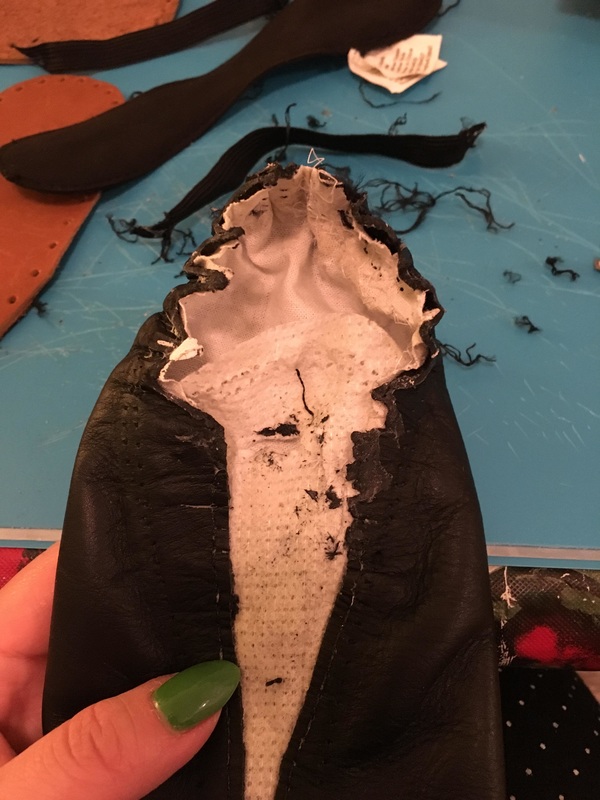
There will be too much material gathering at the toe, undo the gathering and trim the edge. There will be way more than enough material so you might need to trim even more. Next use a 2mm punch to make stitching holes along the edge of the soles. 
Picture
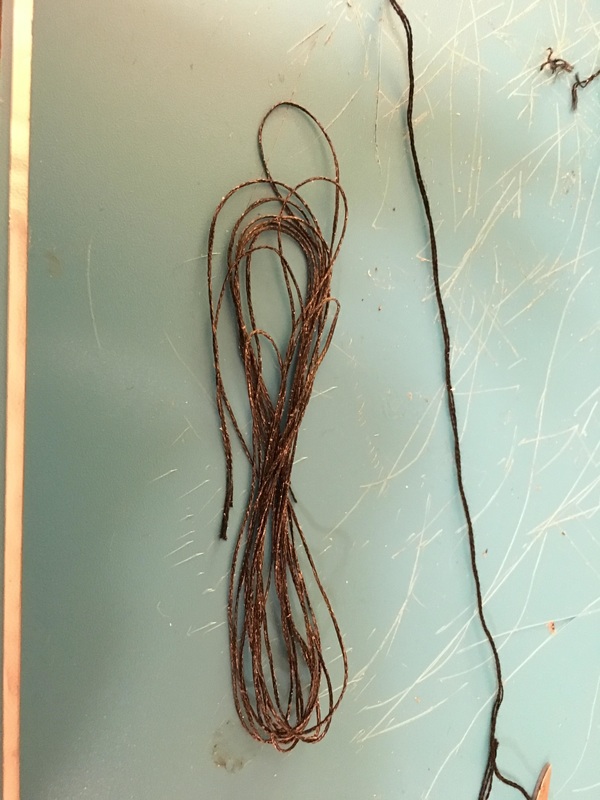
For thread I decided to split embroidery floss in half and coated each piece in beeswax. I used a thick curved needle for stitching the upper to the sole, which was a good idea as the stitching near the toe became very difficult since I cannot pull the needle under. ELHOS recommends starting near the middle on either side and make sure to not stitch the toe part last, which is a great suggestion. The easiest part is the heel part. I added an additional piece of leather at the heel to reinforce it. 
Picture
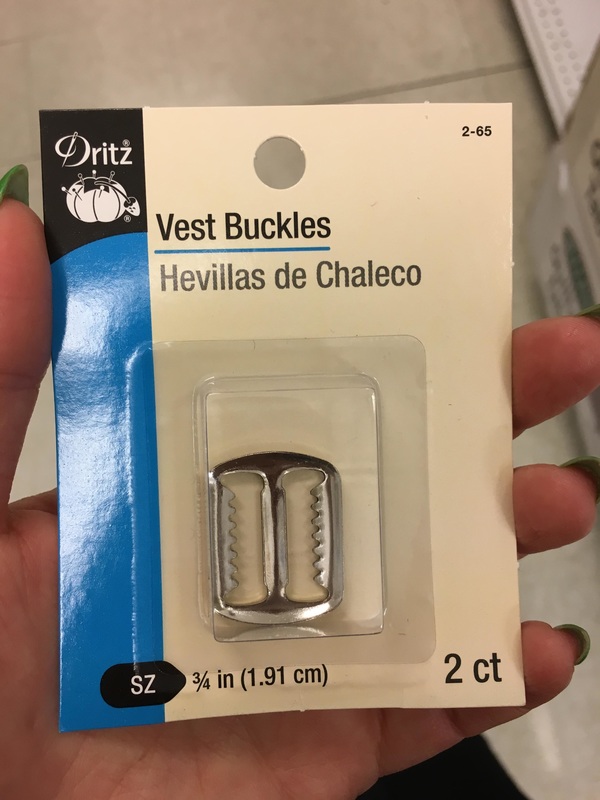
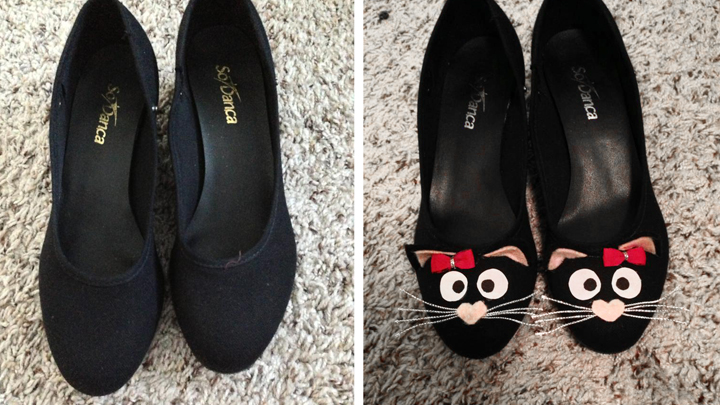
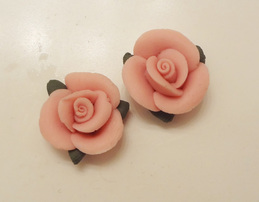
For the decoration I settled for a big bow with a buckle in the middle. I found these buckles at Joanns for $2 that have the right shape. I have some bits of burgundy silk laying around. I wish I have the skills to make more complicated embroidery like the slippers on the left below, but I know that many slippers were simply decorated with just a bow or rosette. 
Well here they are! 
Picture
The Challenge: Procrastination
Material: Leather ballet slippers, scraps of cowhide, scraps of silk and buckles. 
Pattern: Every Lady Her Own Shoemaker's sole pattern
Year: 1850's
Notions: Embroidery floss, beeswax, little buckles
How historically accurate is it?The overall look is accurate enough. They have the right sole shapes, decorations, side seam, etc minus the lack of sharp square toe shape. I took a shortcut and used an existing shoe upper though. So I guess it's about 70% accurate?
Hours to complete: about 9
First worn: Not yet
Total cost: about $15

Oh and I created a tumblr page: chubbyclementine.tumblr.com
0 Comments

Kitty Shoes

9/9/2013

0 Comments

 
Picture
0 Comments

To make a customized compact mirror

8/22/2013

0 Comments

 
I personally don't care that much for compact mirrors since I need to make my purse as light as possible. I prefer to use the mirror that come with my makeup compact. But since I've seen so many people out there who are so excited over those Sephora Disney Princesses compacts that's sold out everywhere (they seem to be more in demand than the actual makeup), I figured I should write a tutorial on how to make customized compact mirrors. It's not quite the same as the Disney Princess compacts, but at least you will have something that's uniquely yours (or make a knock-off Cinderella/Jasmine/Ariel compact if want). It should cost only a few dollars (as oppose to the $20 Sephora charges or more if you have to resort to eBay.)

Here's what you will need: 

  • A cheap metal compact mirror (see below)
  • Cheap white nail polish
  • An image of whatever you want on your compact
  • Good quality top coat (something like Seche Vite)
  • (Optional) Mod Podge Dimensional Magic
  • You might also need box cutter and/or acetone


Picture
Start with a metal compact mirror. Blank mirrors for DIY are not necessarily cheaper. These two are the cheapest ones I can find (let me know if you know any cheaper ones). The one on the left is from Forever 21 and it cost $2.80. The one on the right is by Jessie's Girl and it cost $2.99 (I got it from Rite Aid). As you can see the Forever 21 compact is bigger, but the top part is made from hard acrylic so it's much harder to remove. The one on the right is just a fabric sticker on top, you can easily remove it with just your fingernails. 

There are two ways to remove the acrylic top if you bought the Forever 21 mirror. If you are comfortable using a box cutter, you can find a gap between the bezel and the acrylic and insert the tip of a box cutter under it to pry it off. Since box cutter blades are often very brittle, I find it easier to insert a butter knife in the gap as soon as I managed to lift the acrylic a little bit and use the butter knife to completely lift off the acrylic. Be very careful doing this and remember to point the blade away from you. 

If you are patient you can put some acetone in a shallow dish, open the compact and let the acrylic top soak in acetone for 10 minutes or so (make sure the seam is submerged, but try to avoid letting acetone getting into the mirror side). It should come off easily. 

There is a white sticker between the acrylic (it's actually clear) and the metal. Peel it off and keep the acrylic as a template. 
Picture
If there are any sticker residues, simply use a piece of tape to lift those off.

Prepare the image you want to use on the compact. It can be a photo, magazine cut out, collage, even fabric. Some hardware stores or home decorating stores give out free wallpaper or upholstery fabric samples, you can use those too. Use the acrylic top or the sticker as a template to cut out a circle. 

Next paint the entire surface inside the frame with white nail polish. It doesn't have to be perfect. 
Picture
 Quickly put the image over the wet nail polish, make sure there are no bubbles and the entire surface is sticking evenly. 
Picture
Let the nail polish dry for 15 minutes or so. Paint the surface with a few coats of clear top coat and it's ready to use as soon as the top coat dries completely. 

If you want a smooth acrylic "dome" top, you can use either Mod Podge Dimensional Magic or jewelry resin (both available at craft stores) on top of the clear top coat (using it directly on top of the paper might lift some of the ink off). 
0 Comments

Clay Roses

11/4/2012

1 Comment

 
Picture
I made these from fimo clay. The tutorial can be found here, except I made them much smaller (about 1/2'' diameter).
1 Comment

Lovers' Eyes (Late Post)

11/4/2012

0 Comments

 
Picture
(There were so much going on last week that I forgot to put this post up, sorry about that.)

Anyway, I saw this episode of Antiques Roadshow where they discussed this particular kind of miniature called Lovers Eyes. I borrowed Marie Antoinette's eyes here.
0 Comments

Rose False Eyelashes

10/21/2012

1 Comment

 
I found these very interesting eyelashes by Vivid Vi Vrant.  At first I thought the rose is just a prop for photography, then I realized it's actually part of the eyelashes. To be honest I have no idea when I will ever wear them, but I really want a pair nonetheless. It cost 3675 Japanese yen plus 175 yen tax (around $48) on that website. I happen to have similar Swarovski crystals laying around. I remember color is called Autumn-something (some websites has a color called "Autumn harvest", although I'm not sure if that's the exact color I bought). I got the eyelashes at a dollar store, you can get similar ones from eBay for around $1. The roses are actually fimo clay roses for nail art (although I think they are way too bulky for nails) that I painted with red nail polish.
Picture
The pair below are the ones I made.
Picture
1 Comment

Hair chains

10/14/2012

0 Comments

 
Picture
I've been extremely busy during the week and I can finally relax today. I decided to vamp up my hair a bit. I got several different chains, attach one end to a black bobbie pin and the other end to a flower clip.
0 Comments

Make your own Dior Velvet Eyes

10/7/2012

0 Comments

 
Picture
Painting winged eyeliner is a skill that take ages to perfect. Last year Christian Dior came up with a solution to this by releasing Velvet Eyes. They are essentially appliques that are cut from thin velvet with an adhesive back, so all you have to do is stick them on your eyelid and you get instant perfect eyeliners. However, a pack of 4 sets of eyeliners cost $55, which is very steep considering you are getting 8 stickers.


This year more and more companies are releasing their own knock-off version of Velvet Eyes. While those are cheaper, you can make some yourself for pennies. You will need to find velvet paper (also called flocked paper). Find them at scrapbook section at craft stores in 8''x10'' sheets for $1 (which you can cut more than a hundred pairs from). You can also add rhinestones, glitter, or other decorations for your applique. Finally you will need eyelash glue to stick them to your eyelid. Simply cut the shapes out of the velvet paper and decorate. To apply spread a thin layer of glue that covers the entire back surface of the applique, wait 15 seconds for the glue to become tacky, and carefully stick it close to your lashline.

Picture
Picture
You can print and use this template, or make your own shapes.
Picture
0 Comments

Kodona Leather Crown

9/30/2012

1 Comment

 
Picture
I saw this tutorial for making a crown. I decided to make my own. I use a cheap leather belt and glued wires to the underside so it's easier to shape.
1 Comment

DIY Dior Grand Bal Eyelashes

9/23/2012

0 Comments

 
Picture
Temptalia reported that Christian Dior will launch Grand Bal 2012 Collection for the holiday season. I am particularly intrigued by the false eyelashes. They cost $28.

I made my own version. I used a pair of cheap criss-cross asymmetrical eyelashes. They cost 99 cents on eBay.
Picture
For the sparkle bits I used tiny ball chain for nail decoration. You can easily cut them with regular scissors since they are so thin. Superglue will do the trick for gluing. Here's the result:
Picture
0 Comments
<<Previous
    Loading
    Picture

    Archives

    January 2016
    September 2013
    August 2013
    November 2012
    October 2012
    September 2012
    August 2012
    July 2012
    June 2012
    May 2012
    April 2012
    March 2012
    February 2012
    January 2012
    December 2011
    November 2011
    October 2011
    September 2011
    August 2011
    July 2011
    June 2011
    May 2011
    April 2011
    March 2011
    February 2011
    January 2011
    December 2010
    November 2010
    October 2010
    September 2010
    August 2010
    July 2010
    June 2010
    May 2010
    April 2010
    March 2010
    February 2010
    January 2010
    December 2009
    November 2009
    October 2009

    RSS Feed

    plastic nameplates
Powered by Create your own unique website with customizable templates.