I personally don't care that much for compact mirrors since I need to make my purse as light as possible. I prefer to use the mirror that come with my makeup compact. But since I've seen so many people out there who are so excited over those Sephora Disney Princesses compacts that's sold out everywhere (they seem to be more in demand than the actual makeup), I figured I should write a tutorial on how to make customized compact mirrors. It's not quite the same as the Disney Princess compacts, but at least you will have something that's uniquely yours (or make a knock-off Cinderella/Jasmine/Ariel compact if want). It should cost only a few dollars (as oppose to the $20 Sephora charges or more if you have to resort to eBay.)
Here's what you will need:
Here's what you will need:
- A cheap metal compact mirror (see below)
- Cheap white nail polish
- An image of whatever you want on your compact
- Good quality top coat (something like Seche Vite)
- (Optional) Mod Podge Dimensional Magic
- You might also need box cutter and/or acetone
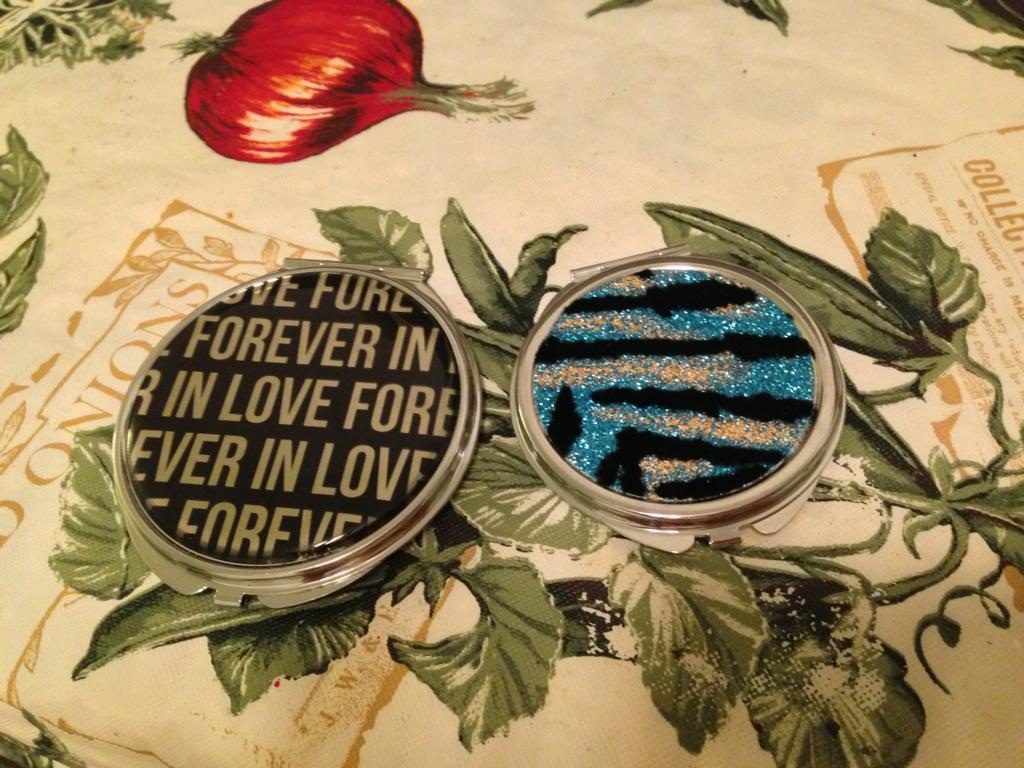
Start with a metal compact mirror. Blank mirrors for DIY are not necessarily cheaper. These two are the cheapest ones I can find (let me know if you know any cheaper ones). The one on the left is from Forever 21 and it cost $2.80. The one on the right is by Jessie's Girl and it cost $2.99 (I got it from Rite Aid). As you can see the Forever 21 compact is bigger, but the top part is made from hard acrylic so it's much harder to remove. The one on the right is just a fabric sticker on top, you can easily remove it with just your fingernails.
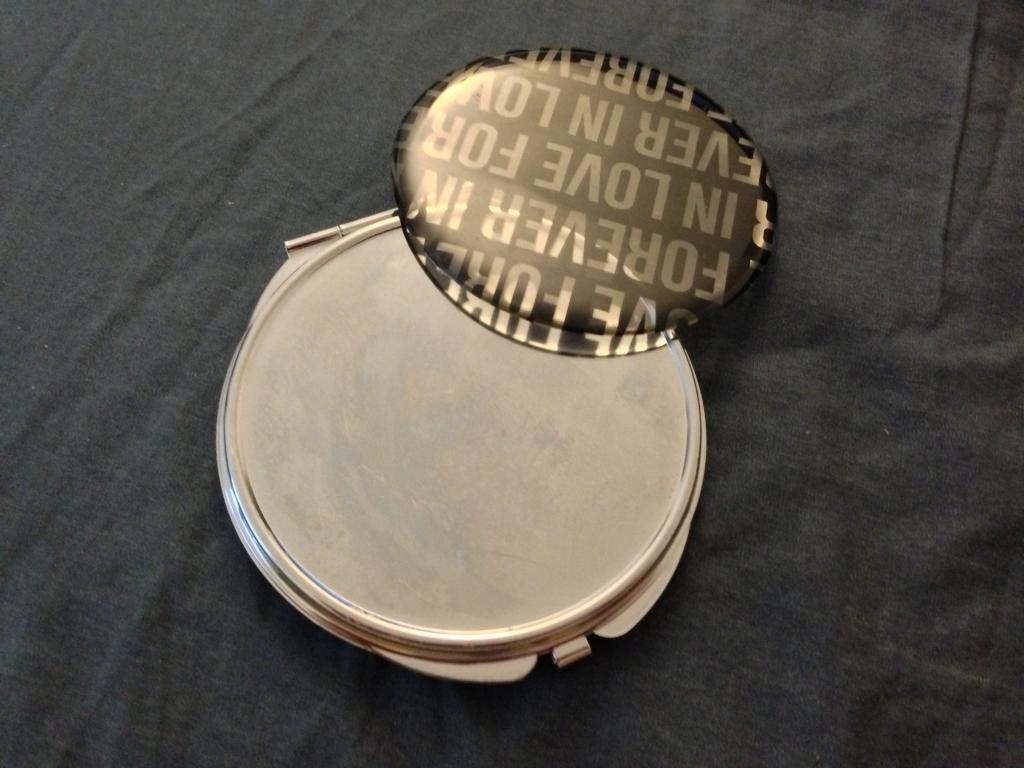
There are two ways to remove the acrylic top if you bought the Forever 21 mirror. If you are comfortable using a box cutter, you can find a gap between the bezel and the acrylic and insert the tip of a box cutter under it to pry it off. Since box cutter blades are often very brittle, I find it easier to insert a butter knife in the gap as soon as I managed to lift the acrylic a little bit and use the butter knife to completely lift off the acrylic. Be very careful doing this and remember to point the blade away from you.
If you are patient you can put some acetone in a shallow dish, open the compact and let the acrylic top soak in acetone for 10 minutes or so (make sure the seam is submerged, but try to avoid letting acetone getting into the mirror side). It should come off easily.
There is a white sticker between the acrylic (it's actually clear) and the metal. Peel it off and keep the acrylic as a template.
If there are any sticker residues, simply use a piece of tape to lift those off.
Prepare the image you want to use on the compact. It can be a photo, magazine cut out, collage, even fabric. Some hardware stores or home decorating stores give out free wallpaper or upholstery fabric samples, you can use those too. Use the acrylic top or the sticker as a template to cut out a circle.
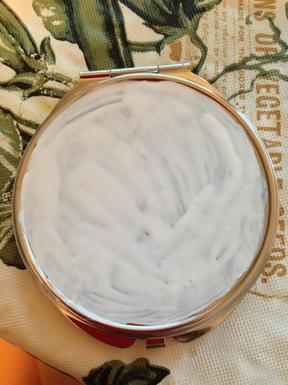
Next paint the entire surface inside the frame with white nail polish. It doesn't have to be perfect.
Prepare the image you want to use on the compact. It can be a photo, magazine cut out, collage, even fabric. Some hardware stores or home decorating stores give out free wallpaper or upholstery fabric samples, you can use those too. Use the acrylic top or the sticker as a template to cut out a circle.
Next paint the entire surface inside the frame with white nail polish. It doesn't have to be perfect.
Quickly put the image over the wet nail polish, make sure there are no bubbles and the entire surface is sticking evenly.

Let the nail polish dry for 15 minutes or so. Paint the surface with a few coats of clear top coat and it's ready to use as soon as the top coat dries completely.
If you want a smooth acrylic "dome" top, you can use either Mod Podge Dimensional Magic or jewelry resin (both available at craft stores) on top of the clear top coat (using it directly on top of the paper might lift some of the ink off).
If you want a smooth acrylic "dome" top, you can use either Mod Podge Dimensional Magic or jewelry resin (both available at craft stores) on top of the clear top coat (using it directly on top of the paper might lift some of the ink off).

 RSS Feed
